
Thanks for all the previous threads on Homelink Garage Remote conversions and the part cross reference with the Malibu.
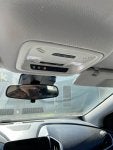
In researching Factory Service Manuals to build a plug-n-play adapter to plug the Malibu Overhead Console Trim into the Volt's wire harness, I stumbled upon GM's accessory instructions for a 2018 "Garage Door Opener Transmitter Package", part # 84214160.
It looks like GM has this part spec'd out, but not yet enabled in their systems or available for order. The "dealer installation instructions" are now available to service techs, though. (see attached)
It appears that the kit will come with the Malibu bezel (with remote) and the plug-n-play harness adapter.
I'm now torn about waiting for this kit to be released or pressing forward with my own do-it-yourself version... With the way GM treats these things, they will probably price this kit for double what it would cost for us to just piece it together ourselves.